


Crispy, golden chicken katsu served with steamed rice and a rich Japanese curry sauce makes this one of Japan’s most popular comfort foods. This easy Japanese Katsu Curry recipe shows you how to make juicy panko-coated chicken with a smooth, savoury curry sauce using Yutaka Katsu Curry Sauce.
Choose between traditional deep-fried chicken katsu or a lighter oven-baked version, then serve with rice and a fresh green salad. Perfect for a satisfying lunch or dinner, this homemade Chicken Katsu Curry is an easy way to enjoy a classic Japanese dish at home.
Ingredients
Curry sauce
- approximately 75g½ large onion, finely chopped
- 1 teaspoon vegetable oil
- 300–400ml(Use more water for a milder, less salty sauce.) water
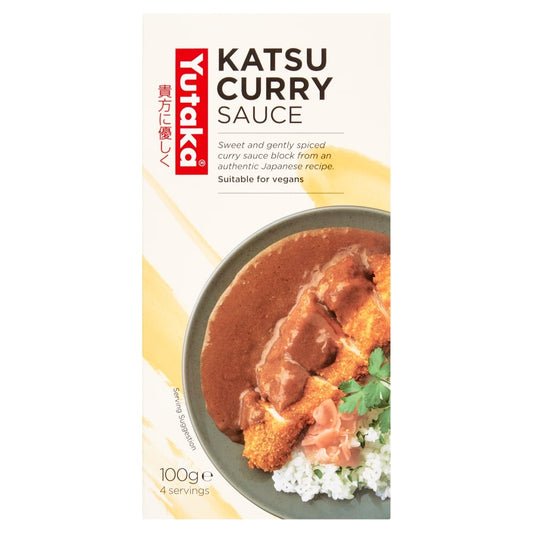
- 50gYutaka Katsu Curry Sauce
Chicken katsu
- 2(approximately 300g in total) skinless chicken breast fillets
- Salt and pepper, to taste
- 50g plain flour
- 1large egg, beaten
- 60g Yutaka Panko Breadcrumbs
- Vegetable oil, for deep-frying(Approximately 30g is estimated to be absorbed.)
To serve
- 150g uncooked rice, yielding approximately 450g cooked ricecooked rice
Cooking Steps
Rice & Side dish
- Soak Rice first while you prepare for the rest of the meal.
- Cook steam rice according to the instrucitons on pack.
- Prepare you favourite green salad to serve with the Katsu Curry.
Sauce
- Chop Onion into small pieces.
- Add a little oil to the pan.
- Gently fry chopped onions on low heat for a few minutes or until lightly browned
- Add 300ml to 400ml of water and bring to boil (use more water if prefer less salty sauce). Simmer for a few minutes.
- Break 50g of Yutaka Curry (half pack) into small pieces and add into the pot. Simmer for about 7 minutes or unitl sauce thickens. Stir constantly to prevent burning.
Chicken Katsu - Deep Frying - Option 1
- Make 4-5 cuts on the chicken to prevent it from bending when cooking, then season the chicken with salt and pepper.
- Coat the seasoned chicken with plain flour.
- Dip chicken in egg and coat with Yutaka Panko.
- Add oil to pan and bring the heat to 170*C.
- Deep fry the chicken for 6-8 minutes.
- Serve with steam rice, green salad, and sliced chicken. Add sauce.
Chicken Katsu - Oven Baking - Option 2
- Preheat your oven to 200 °C
- Toast Panko: Heat 1 tablespoon of olive oil in a non-stick pan on medium-high heat. Once the oil starts swirling around in the pan, add 1 heaping cup of Yutaka panko. Stirring panko constantly for 3 to 4 minutes until they look golden. Turn off the heat and place the toasted panko in a big plate to cook down.
- Season chicken breast with some salt and pepper. Put the flour, the beaten egg and the toasted panko in three plates.
- Coat the seasoned chicken in plain flour, then dip in the beaten egg, and finally coat with the toasted panko.
- Place the chicken in oven tray and cook in the oven for 20-30 minutes (200°C)
Cook sauce as instructed above while waiting for chicken to be ready.
Tips
For evenly cooked chicken katsu, gently flatten thicker parts of the chicken breast before coating. This helps the chicken cook at the same rate and keeps it juicy inside.
2. Press the panko onto the chicken firmly
After coating the chicken in flour and beaten egg, gently press the Yutaka Panko Breadcrumbs onto the surface. A good, even coating helps create the signature light and crispy texture of Japanese chicken katsu.
3. Keep the frying oil at around 170°C
If the oil is too cool, the coating can absorb excess oil; if it is too hot, the panko may brown before the chicken is cooked through. Aim for approximately 170°C for a crisp, golden finish.
4. Make an easier Katsu Curry with ready-made breaded chicken
For a quicker midweek meal, you can use ready-made fried or breaded chicken from the supermarket. Cook or reheat it according to the pack instructions, slice it and serve with steamed rice and Yutaka Katsu Curry Sauce.
5. Adjust the curry sauce to your preference
Use less water for a richer, thicker Japanese curry sauce, or add a little more water for a milder flavour. Stir regularly while simmering to keep the sauce smooth and prevent it from catching on the pan.
6. Rest the chicken before slicing
Let the cooked chicken katsu rest for a few minutes before cutting it into strips. This helps retain the juices and keeps the crispy coating intact.
FAQ
Q.What is Japanese Katsu Curry?
A.Japanese Katsu Curry is a popular Japanese comfort food made with crispy panko-coated chicken served with steamed rice and a rich, mildly spicy Japanese curry sauce. In this recipe, Yutaka Katsu Curry Sauce and Yutaka Panko Breadcrumbs make it easy to recreate an authentic Japanese-style chicken katsu curry at home.
Q.Can I cook chicken katsu in the oven instead of deep-frying it?
A.Yes. For a lighter Japanese Katsu Curry, you can oven-bake the chicken instead of deep-frying it. Toast the Yutaka Panko Breadcrumbs with a little olive oil until golden, coat the chicken with flour, beaten egg and the toasted panko, then bake at 200°C for approximately 20–30 minutes, or until the chicken is fully cooked and golden.
For an even quicker and easier Katsu Curry, you can also use ready-made fried or breaded chicken from your local supermarket. Simply cook or reheat it according to the pack instructions, slice it and serve with steamed rice and Yutaka Katsu Curry Sauce. It’s a convenient way to enjoy Japanese-style Katsu Curry at home with minimal preparation.
Q.How do I make Japanese Katsu Curry sauce thicker or milder?
A.For this Katsu Curry recipe, combine Yutaka Katsu Curry Sauce with approximately 300–400ml of water and simmer for around 7 minutes until thickened. Use closer to 300ml of water for a richer, thicker curry sauce, or add more water for a milder, less salty flavour. Stir regularly while simmering to prevent the curry sauce from catching on the bottom of the pan.
Products used in this recipe
-
- Regular price
- £2.00
- Regular price
-
£2.00 - Offer price
- £2.00
Coming back soon -

- Regular price
- £1.50
- Regular price
-
£1.50 - Offer price
- £1.50
Coming back soon
